As knitters, we are used to working with colour using techniques such as Intarsia, Mosaic knitting or Fair-Isle stranding, and these are all wonderfully creative ways to enhance our knitting projects. However, have you thought about working with two or more strands of colour at the same time? If you haven’t, then you’re missing something – it’s like painting with yarns! By changing first one colour strand and then another you can create absolutely stunning gradients and shifts of tones and shades.
So in today's addition to the “Seeing Double” blogpost series, I want to explore some of the colour effects you can get when you mix different colours together just by using two or more yarns held together while you work.
Graduated Colours:
So in today's addition to the “Seeing Double” blogpost series, I want to explore some of the colour effects you can get when you mix different colours together just by using two or more yarns held together while you work.
Graduated Colours:
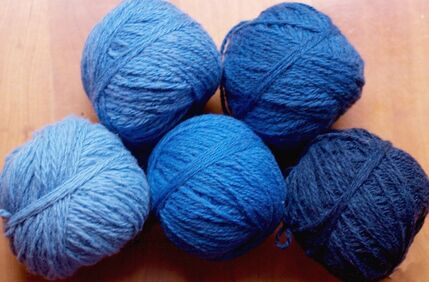
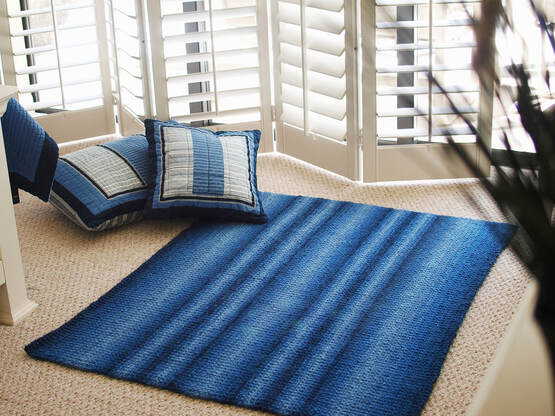
The Ocean Currents Rug pictured at the top of the blogpost shows one of the beautiful effects that you can achieve by gradually changing the value of the colour. The rug uses five closely-related shades of blue and they have been worked together in the order of their “depth of shade”. This is a term used in dyeing to show how strong the colour will be, but can be translated into the simpler concept of dark vs light colours.
By arranging the yarns in the order of their depth of shade we can move from a darker combination to a lighter one. A smaller number of starting colours will give a sharper transition while a larger number of starting colours will allow a more subtle colour shift.
By arranging the yarns in the order of their depth of shade we can move from a darker combination to a lighter one. A smaller number of starting colours will give a sharper transition while a larger number of starting colours will allow a more subtle colour shift.
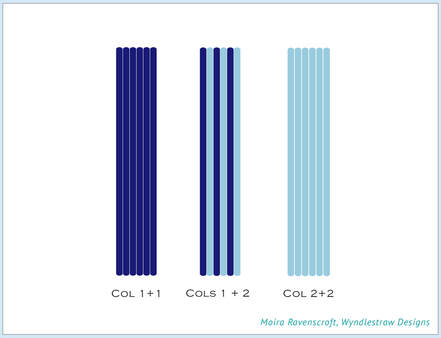
So if you have just two colours, say dark blue and light blue, you can get three different combinations by working with two strands at the same time:
Now if you start with two very similarly toned colours then you will get a gentle transition from one to the other. You can also use this limited transition to move from one colour to another, say from a blue to a green via a lovely kingfisher blue-green in the middle.
Marled Colour Effects:
- 1: Dark Blue + Dark Blue
- 2: Dark Blue + Light Blue
- 3: Light Blue + Light Blue
Now if you start with two very similarly toned colours then you will get a gentle transition from one to the other. You can also use this limited transition to move from one colour to another, say from a blue to a green via a lovely kingfisher blue-green in the middle.
Marled Colour Effects:
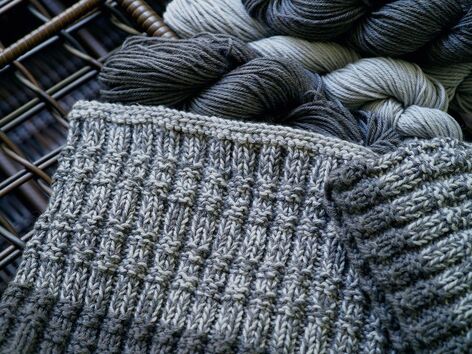
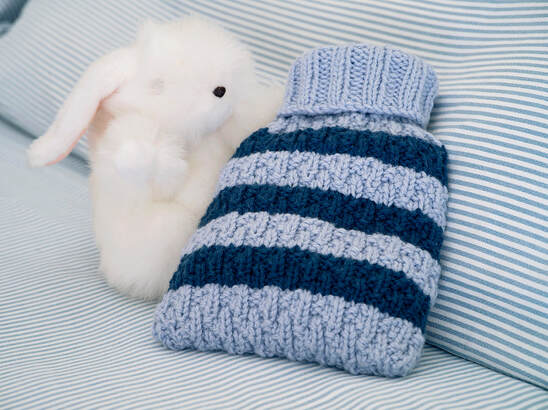
However, a completely different effect can be achieved by working with two highly contrasting yarns. In the Teversham Cowl above, a light colour has been teamed with a much deeper shade to give a wonderfully tweedy look. This is so popular in menswear right now – somehow encapsulating both a modern edge and a “classic” look at the same time. The solid shades have been used to provide edge details which also help to emphasise the central tweedy section.
This combination of dark and light yarns held together gives a “marled” or “marbled” effect as it resembles the colour veins that you often see in rock strata. Of interest, the two colours do not uniformly show in the mixture as they might in a plyed yarn. Instead, the colours emerge and disappear to give a lovely effect.
Indeed, we can use this technique to bring “pops” of colour into the work, by teaming a colourful strand of yarn to run alongside a darker background shade. Hand-dyed yarns often look beautiful when used in this way as their natural variation of shades can give some wonderfully unexpected results.
Ombré Patterning:
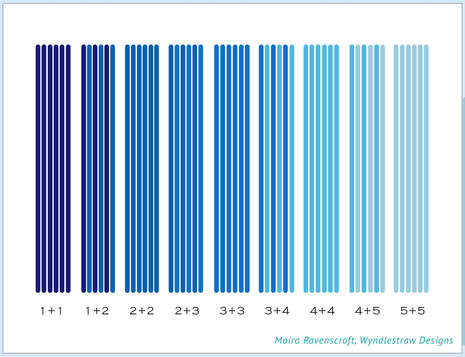
However, for a really subtle shift of tones from dark to light, then you need to increase the number of starting colours. The diagram above shows how the same dark blue I used in the first diagram has now gone through a much gentler colour shift to get to the paler tone, giving a beautiful ombré effect.
You can see this patterning in the photo of the Ocean Currents Rug. There the five closely-matched shades show a gradual shifting from dark to light tones and back again, like waves on the sea shore.
Those particular yarns were handspun and the five “colours” were already blended during the spinning process to produce the starting shades. However, you don’t need to start with handspun yarns to achieve a beautiful effect. There are many commercial yarns such as Cascade 220 that come in a wide arrange of colours so you can select colours to tone together.
Grading from one colour to another:
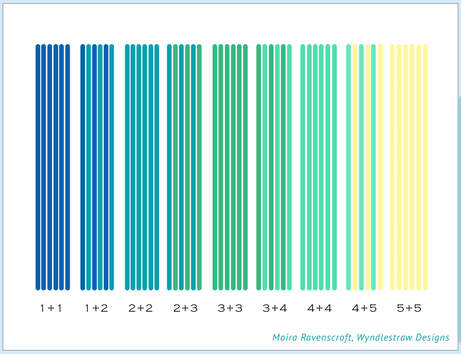
Indeed, you can also use this effect to transition not just from dark to light but also from one colour to another. You can produce a wonderful colour shift or a whole rainbow effect just by arranging your colours in a pleasing way, then picking up first one yarn then another to work in an ever-changing fashion.
This idea is not only a creative technique to bring colour into your knitting but also a great way of using small remnants of yarns. You often see examples of this shift in colour in old-time knitting, when a small child’s sweater would be undone and the yarn reused in a larger project supplements by other shades.
Using Natural Colours:
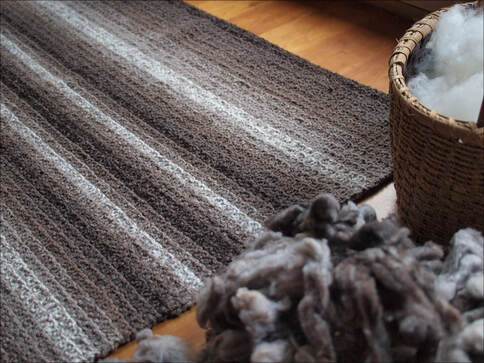
The same graduated effects can also be achieved with natural shades of whites, creams, greys, blacks and browns. In the Rare Earth Rug, the dark to light ombré appearance has been achieved using purely natural shades.
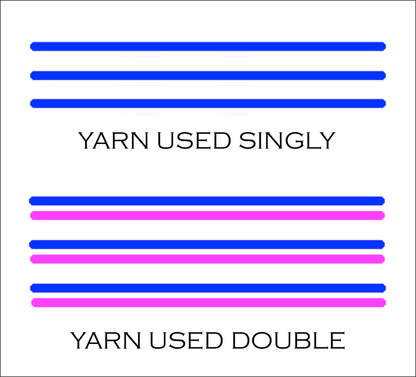
The rug again used five starting colours, but this time toning from a creamy-white to a deep brown-grey. I worked a set of matching cushions using single yarns to give pure colours, but in the rug the yarns were doubled up to give both a thicker result and also to allow the graduated shading from dark to light.
I am going to return to this idea of making matched sets of items using either single or doubled yarns in a later blogpost in this series.
Colour Value:
Beyond the concept of transitioning from one colour to another is the idea of producing a heathery mix by holding two very similar yarns together.
Heathered yarns offer a much softer look to the "marled" effect I mentioned before. They result from a mixture of two or more colours with a very similar “colour value”. Neither stands out as being much darker or lighter than the other, but just vary by their colour. For example, a soft loden green could be combined with a dusky brown to give a lovely country feel to the final combination.
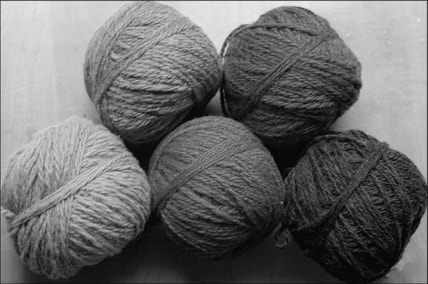
You can tell if a yarn has a similar colour value to another one by taking a photo and then looking at it in greyscale or monotone. Many phones will allow you to do this transition really easily. The photo above shows the same yarns used for the Ocean Currents Rug, but this time in greyscale. The lighter shades show up as white, while the darker shades are in black. Using the lightest and darkest yarns together would give a marled effect as they have the greatest difference in value, but for heathery yarns a mix of the middle colours would be best.
Heathered Mixtures:
Heathered yarns offer a much softer look to the "marled" effect I mentioned before. They result from a mixture of two or more colours with a very similar “colour value”. Neither stands out as being much darker or lighter than the other, but just vary by their colour. For example, a soft loden green could be combined with a dusky brown to give a lovely country feel to the final combination.
You can tell if a yarn has a similar colour value to another one by taking a photo and then looking at it in greyscale or monotone. Many phones will allow you to do this transition really easily. The photo above shows the same yarns used for the Ocean Currents Rug, but this time in greyscale. The lighter shades show up as white, while the darker shades are in black. Using the lightest and darkest yarns together would give a marled effect as they have the greatest difference in value, but for heathery yarns a mix of the middle colours would be best.
Heathered Mixtures:
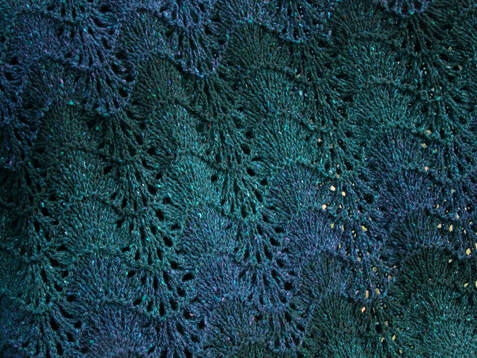
In the second blogpost in this series I featured a shawl I had made that turned out to be magically warm – and this shows the beautiful heathery mixtures you can get from yarns which have a close colour value. The blue and mid-green layers almost seem to meld together.
Of course you can find many lovely heathered yarns in the shops, but how much more exciting it is to blend them yourself for a completely unique look. Selecting two or more thin yarns and blending them for yourself gives you a much greater choice over the exact shades used and the final effect.
Another interesting point is that when you are working with your own mixture of colours, you can select when to drop one colour and bring in another. This can give some wonderfully subtle colour banding and shading. You could, for example, have a band where a dusky brown background yarn has a blue colour held alongside, before shifting to another band with the second yarn in green. This would give a wonderfully subtle shift in colour as you work your scarf or sweater.
Again, this would be a very creative way of using small remnants of yarn to give interesting combinations – here a band of grey with burgundy and there another band with the same grey mixed with blue, for example.
Rescuing "surprise" colours:
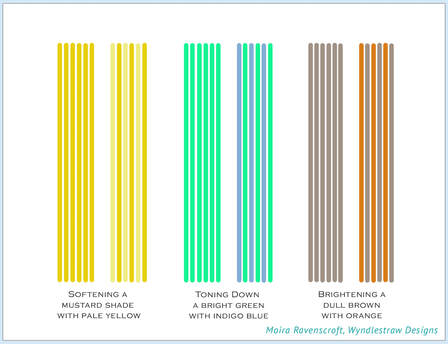
We can also use this idea of combining colours to help rescue “surprise” yarns that the Postie has just delivered. I am sure I’m not the only person who has ordered a lovely dusky yellow from the internet only to have a bright mustard colour appear on the doorstep… It is certainly hard choosing colours on-line rather than in person!
However, you could run a soft yellow yarn alongside that unfortunate mustard shade to tone it down, or add an indigo blue to take the sting out of an overly bright green. You could also add a brighter more zingy orange colour to take a blah brown into an exciting combination colour. It is amazing what a second strand of yarn can do to change the look completely.
Working with two strands of yarn held together is also an excellent way to blend different dyelots. We knitters have many ways of hiding the slight differences in dyelots, but bringing them together at the same time is an excellent way to disguise any differences.
Next time . . .
I hope that gives you lots of inspiration for creating tonal, blended and tweed effects in your knitting! Next time in the series, I will be chatting about texture and using different combinations of fibres to extend the range of fibre combinations in your knitting world.
If you would like to go back back to the start of the series, then please click here, then follow the links at the bottom of each page to get back here again.
Until next time – keep safe and happy!
Moira
 | Last Blogpost: Seeing Double #3 – It's good to have options Seeing Double Series #1: Knitting with two ends of yarn Next Up: Seeing Double #5 – Mixing it up Our book: Reversible Knitting Stitches My Website: www.wyndlestrawdesigns.com |
Keywords: Tutorials/Seeing Double,
blending yarns, colour combinations, colour value, double knitting, knitting with two
blending yarns, colour combinations, colour value, double knitting, knitting with two